

Here is the updated post with your sleeping pad R-value guide linked in Section 3 alongside your other calculators and safety resources.
Stop Freezing in Your Down Jacket: How Microclimate Outdoor Layering Actually Works
You spent weeks researching the best down jacket. You dropped four hundred dollars. Yet, there you are, standing on a ridgeline or waiting at the trailhead, shivering. You feel a cold, clammy draft, and you can’t figure out why your expensive gear is failing you.
The uncomfortable truth is this: Your expensive jacket isn’t failing. Your layering system is.
Most people, from beginners to seasoned weekend warriors, treat outdoor clothing as static “warmth traps.” This is a mistake. To stay warm, you must stop focusing on insulation and start managing humidity.
This guide breaks down the microclimate science of staying warm when active, moving from simple diagnostics to advanced fabric specifications like CFM and moisture transfer rates.
1. The Core Misconception: Insulation vs. Humidity Management
The most dangerous word in the outdoor industry is “warm.” A piece of clothing is not warm; you are warm. Your body generates heat. Clothes are simply tools that manage how that heat—and crucially, your sweat—is preserved or released.
The moment you start hiking or skiing, you become a furnace. You sweat. If that moisture is trapped against your skin, it will dramatically accelerate heat loss once you stop moving. This is the root cause of standard “trail freezing.”
The Beginner Diagnostic: Why Am I Still Cold?
If you are shivering despite wearing heavy layers, ask yourself this one question: Am I sweating or damp?
If the answer is yes, you are experiencing the “Flash-Off Effect.” As soon as you stop moving, your heavy insulation traps your own sweat. When you finally vent or stop, the liquid moisture absorbs your body heat to evaporate, cooling you exponentially faster than dry air ever could. In cold environments, unmanaged sweat and sudden temperature drops are classic single points of failure that lead to hypothermia—a key risk outlined in our Backcountry Pre-Mortem Guide.
The Golden Rule of Trail Layering: If you are actively hiking in anything below freezing, you should feel slightly cool at the start. If you are cozy and warm standing still at the trailhead, you will sweat, and you will freeze later.
2. The Intermediate Framework: Active vs. Static Insulation
This is where the $400 puffer fails you. Most down jackets (unless specifically marketed as “active down”) are static insulation. They are designed to trap maximum air when you are not moving—like sitting in camp or standing still.
When you wear a big puffer while hiking:
- You Overheat: The jacket’s high loft and windproof shell trap all your metabolic heat.
- You Sweat Profusely: Your body tries to cool down.
- The Insulation Collapses: Sweat moisture wets out your base layer and begins soaking into the down. If your puffer isn’t using hydrophobic down (treated to resist water), the feathers lose their loft and stop insulating entirely.
For activity, you need Active Insulation.
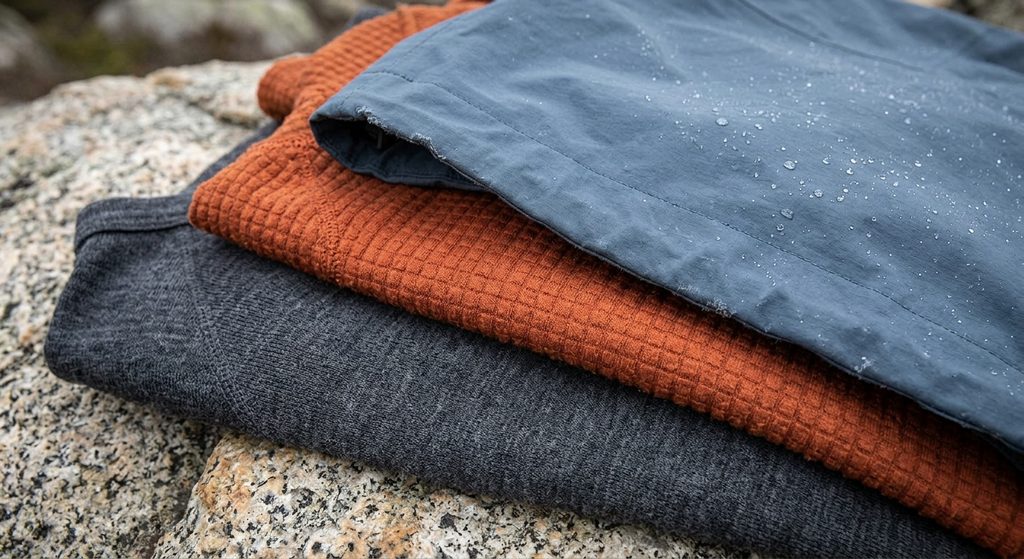
Active insulation is specifically designed to let heat and moisture escape while still providing moderate warmth. This typically involves air-permeable synthetic fill (like Polartec Alpha or Primaloft Gold Active) or highly textured fleeces (like the 1/4 zip grid fleece seen in the image above).
| Layer Type | Best For | Fabric Behavior | Example |
| Base Layer | Wicking sweat | Hydrophobic (rejects water) fibers (merino, polyester) | Merino T-shirt |
| Active Insulation | Warmth while moving | Air Permeable (vents heat/vapor), light wind resistance | Grid Fleece, Breathable Synthetic Hoody |
| Static Insulation | Warmth while stopped | Maximum Loft, Highly Windproof (traps air) | Heavy Down Puffer |
3. The Expert Technical Deep-Dive: CFM and Vapor Transfer
For expert users optimizing their layering for complex objectives (e.g., alpine climbing, winter camping, or ski touring), the conversation moves beyond simple definitions into explicit fabric metrics.
You must choose layers based on how much air they allow to pass through them (the “permeability”) to achieve equilibrium between warmth and sweat management.
The CFM Sweet Spot
The key technical spec here is CFM (Cubic Feet per Minute), which measures air permeability.
- A “windproof” hard shell (e.g., Gore-Tex Pro) typically has a CFM of near zero. It lets almost no air pass, trapping massive heat.
- A classic wind shirt (e.g., Patagonia Houdini) often has a CFM of around 3–10. This is still highly wind-resistant but provides a crucial, tiny vent.
- Ideal Active Insulation (e.g., Arc’teryx Proton, Patagonia Nano-Air) targets a CFM between 20 and 50.
A midlayer shell in the 20–40 CFM range is the holy grail of active use. It cuts the wind enough that you don’t freeze on an exposed ridge, but it is permeable enough to allow sweat vapor to push through and evaporate, preventing the Flash-Off Effect.
The Breathability Metric (MVTR)
You will often see breathability defined by MVTR (Moisture Vapor Transmission Rate, measured in $g/m^2/24hr$).
While helpful, MVTR can be misleading as it measures how much moisture passes through a membrane (like the blue shell in our image), not the entire air-permeable system. Focus first on getting your CFM right for your activity level.
(Note: Managing warmth on the trail is only half the battle. When you reach camp, ground heat loss becomes your primary issue—dial in your total sleep insulation using our Sleeping Pad R-Value Calculation for Canadian Camping and our Backcountry Gear Math & R-Value Calculator.)
Conclusion: How to Build Your Precision Microclimate System
You don’t need a single, magical warm jacket. You need a modular system designed for your environment and output.
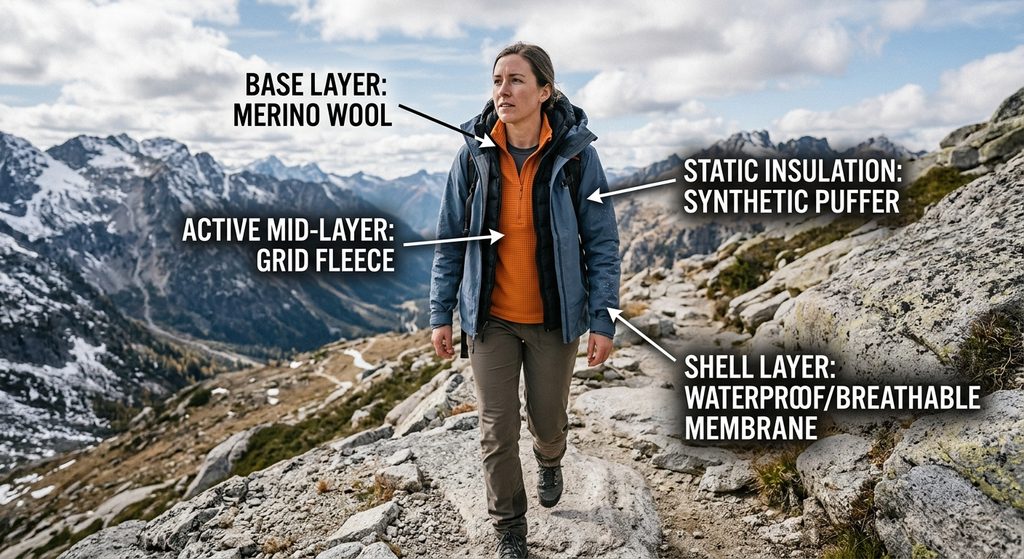
- 1. Start Dry (Base): Use only Merino wool or synthetic. Absolutely no cotton. Your base layer’s only job is moisture transport.
- 2. Dial Your Permeability (Mid): Choose your active layer based on wind:
- Calm & Cold: A high-CFM (40+) high-loft grid fleece or open synthetic (e.g., Polartec Alpha) is best.
- Windy & Active: Choose a synthetic active layer with a 20–30 CFM shell fabric (e.g., standard breathable hoodies).
- 3. Block the Weather (Shell): Your waterproof/windproof shell should only be worn when it is actively precipitating or the wind is critical. Do not hike in it by default.
- 4. Pack Your Puffer (Static): The $400 down puffer stays in your pack. You only pull it out when you stop—for lunch, at camp, or during a rescue. Put it on over your active layers to lock in the heat you just generated.
For more trip-planning templates, safety protocols, and gear checklists to prepare your kit before heading out, check out our full printable collection in the Resource Hub.
